quarta-feira, 24 de abril de 2013

Another Crochet Shawl - Mais Um Xaile em Crochet


Alt="crochet shawl, Eva's Shawl, xaile em crochet"
                                          Fotografia/Photos Nuno Neto Miranda

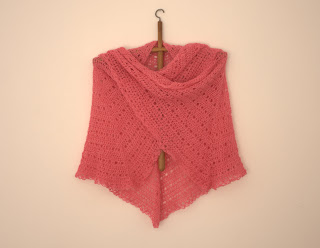
Mais um xaile em crochet, desta vez para mim. Já fiz dois destes xailes para oferecer à minha mãe e à minha irmã, e este tinha de ser meu. É tão macio e leve! E adoro a cor! Usei um fio muito fino, uma mistura de lã de merino e seda, e uma agulha de crochet de 5mm. Estou muito satisfeita com o resultado. Este modelo, Eva's Shawl, é muito simples mas muito bonito, excelente para uma primeira tentativa. E tenho a certeza de que para mim não será a última!

Another crochet shawl, this time for me. I have already made two of these to give to my mother and my sister, and this one had to be mine. It's so soft and light! And I love this color! I used a merino and silk lace yarn and a 5mm crochet hook, and I'm very pleased with how it turned out. This pattern, Eva´s Shawl,  is very simple but beautiful, really good for a first try. And I'm sure this won't be my last!

Alt="crochet shawl, Eva's shawl, xaile em crochet"

quinta-feira, 18 de abril de 2013

1920's Vintage Crochet Skirt - Saia em crochet de 1920

alt="vintage crochet skirt, 1920's vintage crochet, early 20th century vintage crochet, saia em crochet antiga, crochet início do século XX 1920"
                                         Fotografia/Photos Nuno Neto Miranda


Esta saia em crochet, feita para uma menina, é para mim muito especial, de um valor inestimável. Foi feita para a minha querida avó, que teria hoje 99 anos se ainda fosse viva. Esta saia em crochet deve ter portanto quase 100 anos! É espantoso como ainda está como nova depois de quase um século! Lembro-me de vê-la em criança - e ainda bem que é demasiado pequena para servir a uma menina de 5 ou 6 anos (acho que deve servir a uma menina de 2 ou 3 anos) porque um dos meus passatempos preferidos nessa idade era brincar aos disfarces com as roupas antigas da minha avó (incluindo com um vestido de baile de que eu a a minha irmã gostávamos particularmente). Gosto mesmo muito desta saia e fico muito feliz por me caber a mim cuidar dela e guardá-la para as gerações futuras!


This is a very precious and special crochet skirt made for a little girl. That little girl was my dear grandmother, who would be 99 years old if she were still alive today. So this little crochet skirt must be almost 100 years old! It's amazing how it survived unscathed to this day after almost a century! I remember seeing it as a child - and I am glad it is too small for a 5 or 6 year old (I think this should fit a 2 or 3 year old) because one of my favorite activities as a child was dressing up with my grandmother's antique garments (including a ball dress that me and my sister particularly fancied). I really love this skirt and I'm very glad that it is my job to take care of it and keep it safe for future generations!


sexta-feira, 12 de abril de 2013

Sweet Little Granny Tunic Dress Free Crochet Pattern - Vestidinho Túnica em Crochet: Instruções Passo a passo


 alt="free crochet pattern, crochet granny dress, crochet granny tunic, vestidinho em crochet, túnica em crochet, instruções passo a passo"
                                           Fotografia/Photos Nuno Neto Miranda
Scroll down for English
 
Fiz este vestidinho túnica em crochet para a minha filha com uns novelos de fio acrílico que comprei muito baratos em promoção. Adoro as cores! Acho que combinam muito bem umas com as outras. 
Este modelo é muito simples e rápido de fazer, é trabalhado de cima para baixo, em círculo, debruado com conchas. Serve a uma menina de 18/24 meses. Para fazer esta túnica é preciso:

Materiais
Agulha de crochet 5mm
Fio acrílico para bebé (5 cores)

Abreviaturas
Corr - corrente
Pa - ponto alto
Pbmo - ponto baixíssimo

Instruções Passo a Passo
56 corr, juntar para formar um círculo.
3corr, 2pa, 1corr, *saltar 1 corr, 3pa, 1corr saltar 1 corr, 3 pa* até ao fim da volta, terminar com pbmo no topo da 3ª corr. Fica com 14 grupos de 3 pa e 14 espaços.
Mude de cor. 4 corr e 3pa no 1º espaço ( este vai ser o 1º aumento), 1corr, 3pa no espaço seguinte, 1corr 3pa no espaço seguinte, 1corr, 3pa, 1 corr, 3pa no espaço seguinte (2º aumento), 1 corr, 3pa no espaço seguinte, 1 corr, 3pa no espaço seguinte, 1corr, 3 pa no espaço seguinte, 1 corr, 3pa, 1 corr, 3 pa no espaço seguinte (3º aumento), 1 corr, 3pa no espaço seguinte, 1 corr, 3 pa no espaço seguinte, 1 corr, 3pa, 1 corr, 3 pa no espaço seguinte (4º aumento), continuar com os grupos de 3 pa e 1 corr até ao  fim da volta, terminando com 2 pa 1 pbmo na 3ª corr (1º aumento).
Agrora vai trabalhar o corpo do vestido com grupos de 3 pa em cada espaço de 1corr entre os grupos de 3 pa da volta anterior, e 3 pa, 1 corr, 3 pa em cada espaço de 1 corr de cada aumento. Não se esqueça que cada volta é trabalhada numa cor diferente, por isso terá de mudar de cor em cada volta. Fiz 7 voltas para completar o corpo do vestido, mas poderá fazer mais ou menos, consoante o tamanho que pretender. Agora vai fechar as cavas e começar a trabalhar a saia.
Em vez de continuar a fazer os aumentos, vai fazer grupos de 3 pa sem corr entre eles até ao próximo aumento, saltar todos os espaços até ao próximo aumento (cava) e fazer 3 pa em cada espaço até ao aumento seguinte, saltar todos os espaços até ao aumento seguinte (cava), e terminar com pbmo na 3ª corr. A partir de agora, todas as voltas são trabalhadas com grupos de 3pa separados por 2corr. Fazer 17 voltas desta forma, ou até obter o comprimento desejado. O vestido está terminado. Basta debruar com conchas da seguinte forma: 4 pa em cada espaço do decote e pbmo no pa do meio de cada grupo de 3 pa, e 5 pa em cada espaço das cavas e da saia, 1 pbmo no pa do meio de cada grupo de 3pa.
Terminei o meu vestidinho com um cordão com flores nas pontas para atar com um laço (as instruções estão aqui).
Para rematar as pontas (e são muitas) segui as instruções fantásticas de Le Monde de Sucrette.

Bom crochet!

alt="free crochet pattern, crochet granny dress, crochet granny tunic, vestidinho em crochet, túnica em crochet, instruções passo a passo"


This is a sweet little granny tunic dress I have crocheted for my daughter with some odd balls of acrylic yarn I bought very cheap on sale. I love these colors! I think they work really well together.
This pattern is very quick and simple to crochet, it's worked top down, in the round, and finished with a shell edging. It fits a 18/24 months little girl. To crochet this tunic dress you will need:

Materials
5mm crochet hook
Acrylic baby yarn (5 colors)

Abbreviations
Ch - chain
Dc - double crochet
Slst - slip stitch

Pattern
Ch 56.
Ch3, 2dc, ch1, *skip 1 ch, 3dc, ch1 skip 1 ch, 3dc* to end of row, finish with slst on top of ch3. You'll have 14 3dc clusters and 14 gaps.
Change color. Ch 4 and 3 dc in the first gap (this will be the 1st increase), ch1, 3dc in the next gap, ch1, 3dc in the next gap, ch1, 3dc, ch1, 3dc in the next gap (2nd increase), ch1, 3dc in the next gap, ch1, 3dc in the next gap, ch1 3dc in the next gap, ch1, 3dc, ch1, 3dc in th next gap (3rd increase), ch1, 3dc in the next gap, ch1, 3dc in the next gap, ch1, 3dc, ch1, 3dc in the next gap (4th increase), continue with the 3 dc clusters ch1 to end of row and finish with 2dc and slst on top of ch3 (1st increase).
Now you'll work the body of the dress with 3dc clusters in each ch1 space between 3dc cluster of previous row, and 3dc ch1 3dc in each ch space of each increase. Don't forget, each row is worked in a different color, so you'll need to change color each row. I worked 7 rows like this, but you can do more or less to obtain the correct size. Now you are going to close the armholes and start crocheting the skirt.
Now instead of continuing with the increases, you will work 3 dc clusters in each gap without ch1 between them until next increase, skip all the gaps until next increase (armhole) and 3dc cluster in each gap to next increase, skip all the gaps to next increase (armhole) and finish with slst on top of ch3. From now on, you''l work all the rows with 3dc in each gap and ch 2 between the dc clusters. Work 17 rows like this, or until you have the desired length. Now your dress is completed. You'll just need to work a shell edging with 4dc in each gap of the collar and sl st on the middle dc of 3dc cluster, and 5 dc in each gap and sl st in the middle dc of 3 dc cluster on the armholes and skirt.
I have finished my dress with cute flower ties, you can find the pattern here.
To weave in ends (lots of ends), I used a fantastic tip from Le Monde de Sucrette.

I hope you'll have fun!


Todos os meus modelos e instruções são disponibilizados gratuitamente. Mas se quiser ajudar-me a manter este blog e apoiar o meu trabalho, o seu donativo será muito bem recebido e utilizado na criação de novos projetos. Bem haja!!!

All my patterns and tutorials are available for free. But if you wish to help me maintain this blog and support my work here, your donation will be most welcomed and used in my new projects. Thank you!!!

terça-feira, 9 de abril de 2013

Ridiculously Quick Crochet Shrug

alt="crochet shrug, colete em crochet"
                                          Fotografia/Photos Nuno Neto Miranda


Este coletinho em crochet estava perdido no fundo de uma gaveta desde Setembro do ano passado, por ficar demasiado grande à minha filha quando o acabei. Mas em vez de desmanchá-lo e fazê-lo mais pequeno, achei que ela haveria de crescrer até estar à medida. Como é óbvio, tinha razão, e eventualmente acabará por usá-lo nesta Primavera, quando o tempo assim o permitir...


This little crochet shrug was lingering in a drawer since last September or so, because it was way too big for my daughter at the time it was finished. But instead of unravel and make it smaller, I thought she would eventually grow to fit it. I was obviously right, and hopefully she will get to wear it this Spring, in a more forgiving weather...

terça-feira, 2 de abril de 2013

Crochet Rug - Tapete em Crochet

alt="crochet rug, tapestry yarn, tapete em crochet, lãs para tapeçaria"
                                          Fotografia/Photos Nuno Neto Miranda

Please scroll down for English

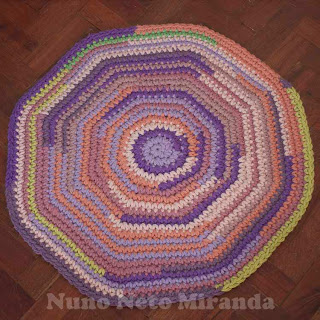
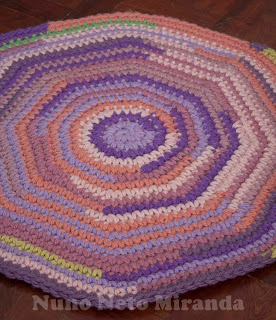
Fiz este tapete em crochet para o quarto dos meus filhos com restos de lã que sobraram do meu projeto de tapeçaria do 9º ano - é verdade, a minha mãe tinha estas lãs guardadas há mais de 25 anos! É uma lã para tapeçaria bastante grossa, difícil de trabalhar, mas fiquei muito satisfeita com o resultado, sobretudo porque os miúdos adoraram e porque finalmente lhe dei um bom destino.


alt="crochet rug, tapestry yarn, tapete em crochet, lãs para tapeçaria"


This is a crochet rug I have made for the kids room with some scrap yarn left from my 9th grade weaving project  - that's right, my mother had this stashed for more than 25 years! It's a very thick tapestry wool yarn, rather difficult to work with, but I was pleased with how it turned out, especially because the kids were thrilled and because I have finally found some good use for it.

alt="crochet rug, tapestry yarn, tapete em crochet, lãs para tapeçaria"